Typescript+verdaccio+pm2构建私有工具包
前言
项目中经常会用到某些方法,比如格式化时间戳,比如判断环境等等。
笔者最初是把这些方法抽离出来写成公共方法,但由于后期项目扩展每次都要复制这个工具文件很是麻烦且效率低下,发布npm包正好解决了这个痛点,正好借此机会重构成ts文件并发布npm包。本工具内置
vue2.x + ts,方便开发中调试代码。
本工具包内部集成了lodash的一些方法,详见文档或者src/core/lodash-tool本工具使用
typedoc根据注释自动生成文档,可搜索方法本项目npm包单元测试通过率100%,同时经过公司多个项目沉淀,且稳定运行,大家如有需要可直接下载拓展使用
本文只简要介绍下整个流程,具体项目GitHub,欢迎Start、Fork。thx~ XD
简要
- 工具
- 项目架构
- 初始化
- 单元测试
- 文档输出
- 打包
- 发布
工具
插件
本工具包使用下列插件规范开发,定制团队开发规范
- eslint
- tslint
- prettier
- commitlint
- husky
项目架构
1 | . |
初始化
npm init初始化项目- 安装依赖
npm i -D gulp del typescript - 安装rollup依赖
npm i -D rollup rollup-plugin-node-resolve rollup-plugin-commonjs rollup-plugin-typescript2 rollup-plugin-uglify rollup-plugin-sourcemaps rollup-plugin-json - 安装辅助插件
npm i -D typedoc jest @types/jest ts-jest - 在项目中新建一个src文件,编写公共文件
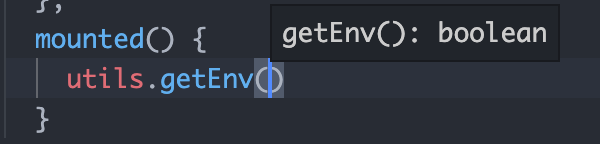
- 需要一个types文件夹存放声明文件(用于代码提示)
- 所有文件都需要通过src/index.ts 对外抛出
1 | // gulpfile.js |
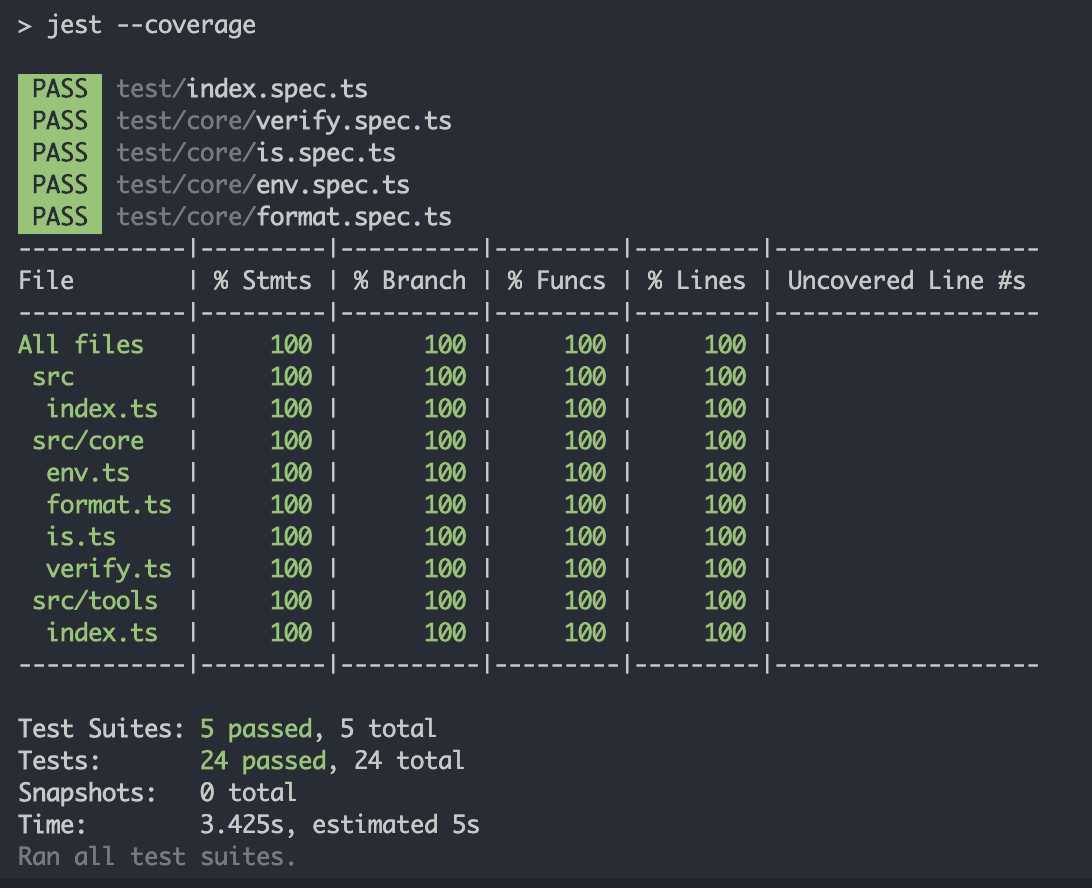
单元测试
配置代码通过率最低标准
例如我配置的 必须全部分支、方法、代码行数通过率达到90%才算测试通过
1 | coverageThreshold: { |
jest --coverage // 生成测试覆盖率
文档输出
- 配置typedoc
1 | // package.json scripts片段 |
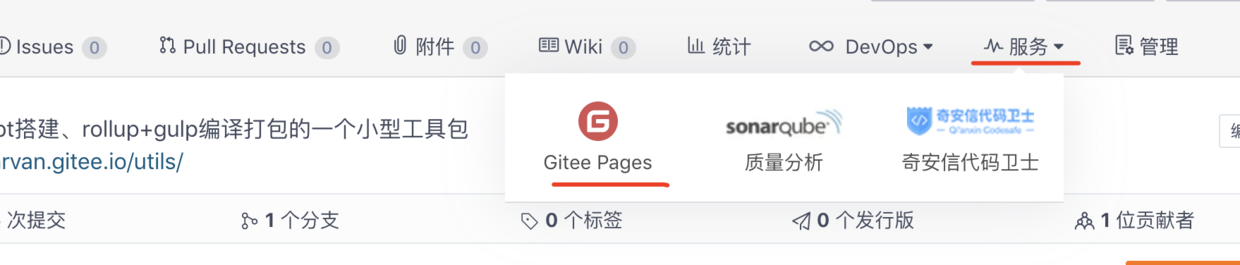
- build后就可以提交到git服务器,比如我用的gitee使用gitee pages(静态页面托管,免去自己申请域名、服务器、虚拟主机等,github有github pages等)
- gitee pages简单的设置下入口文件(比如docs/index.html)就会生产对应的在线文档链接
- 使用 git hooks搭配 lint-staged 在提交时先去格式化暂存区代码,保持代码干净之后push代码
打包
使用rollup配合gulp打包编译
- gulp配置中使用del删除dist文件,避免其他意外问题
- 使用rollup编译ts文件
- 编译后会保留声明文件,在package.json中typings字段写入汇总的声明文件地址,用于代码提示
- 丑化压缩js文件
- 输出到package.json定义的入口文件dist/index.js
发布
一、发布到npm市场
- 需要先在terminal登录npm
- 手动修改package.json的version(后期脚本自动更新),npm publish,成功后会得到一个版本信息
1 | + @jarvannnn/utils@0.0.1 |
- npm i –save @jarvannnn/utils 就可以项目中使用了
二、使用verdaccio搭建npm私服,并使用pm2守护进程
npm install -g verdaccio pm2全局安装verdaccio以及pm2[^pm2]- terminal直接输入verdaccio
即可立即运行,默认抛出端口为4873,我们可以使用pm2 start verdaccio指令使其运行到后台 - 现在我们可以通过
localhost:4873访问npm私服^localhost - 发布到verdaccio平台 首先需要在terminal中输入
npm adduser --registry http://localhost:4873注册用户,输入用户名、密码、邮箱等信息注册 npm publish --registry http://localhost:4873发布代码包
tips: 如果跟我一样不喜欢每次发布都要输入–registry,那么可以借助nrm[^nrm]镜像源管理工具来管理本地源
项目中使用

[^pm2]: * pm2 start verdaccio 启动verdaccio
* pm2 stop verdaccio(all) 停掉verdaccio(或全部)
* pm2 delete verdaccio 删除verdaccio
* pm2 show verdaccio 显示verdaccio运行日志
[^nrm]: * nrm add mynpm http://localhost:4873 添加本地源
* nrm use mynpm 切换本地源
* nrm ls 查看本地所有源